Wednesday, November 17, 2010

Kitchen Floor

The kitchen floor was a sore spot in the house even in it's original condition.  The linoleum looked yellow and was coming up in some spots. We questioned weather or not there were hard wood floors under the linoleum but we weren't sure.  Eventually we decided that either way the linoleum had to go. We started ripping it up and found a layer of ply wood under it.  We then ripped that up along with 1.2 billion staples that were in it. Cacky is a staple pulling champion. She pulled more then I did and I somehow managed to strain my toes. I guess I would have been wearing knee pads so I didn't have to crouch down most of the time.


After removing the ply wood we found another layer of linoleum! YAY, now we get to take that up as well.  Under that was some felt backing which we scraped up and then some cardboard and some type of glue that held everything down.  We did everything we could to get the glue up, we even tried 34 grit sand paper on a belt sander. The belt sander was out best bet and after 30 minutes we were able to get a patch sanded down enough to realize that there really were hard wood floors under all that crap! I know you all love my outfit.

Well that pretty much sucked, so we decided to call and find out how much it would cost us to have the rest of floor finished in the kitchen.  The price was so reasonable we had a professional come in and sand off all of the glue, stain, and seal the floor.  The pictures are after 1 layer of stain.
We then had to rip out the sink to make sure the kitchen was clear for the floor guy.


There was a little bit of damage to the floor but most if not all of it will be covered by cabinet.
We are currently waiting for our cabinets to come in, that will be a huge step for us.  Hopefully sometime in the next 2 weeks we will have them.  Then there will be many more adventures!

Kitchen Ceiling and Recessed Lighting

Eamonn again,
Recessed lighting... oh recessed lighting. 
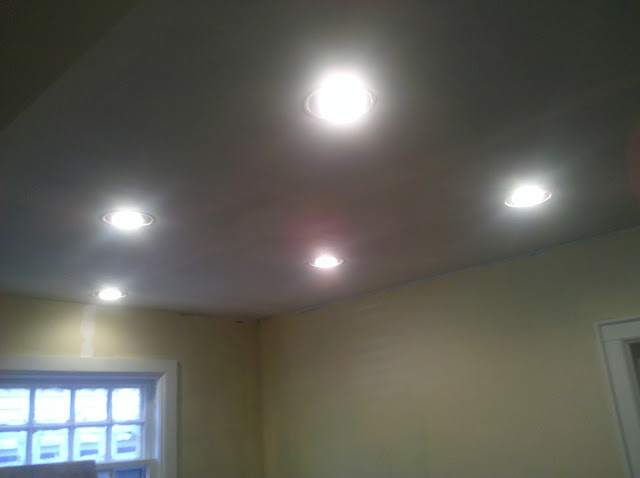
I was all set to get a fixture for the ceiling and be done with the lighting.  Cacky and posse had quite a different view of what was about to happen. Cackys people said that they would not stand for anything less then recessed can lighting in the kitchen.  I was against this as I knew it was require wiring and cutting holes in the plaster ceiling. Also, have I mentioned that I am tired of not having a kitchen??
Luckily Dan Allen comes though once again and brings home a hold saw that cuts just over a 6in hole in the ceiling and mounts to a drill. This saw didn't have teeth on it, it just had what appeared to be a rough edge so it more or less ground away the ceiling rather then trying to cut it with teeth.  Cutting sheet ROCK and plaster with blades sounded like a horrible idea anyway.  This tool is amazing! Don't ever try to cut a hole in old ceilings without it.

Now comes the fun part. This is when I start getting yelled at by my loving wife for not doing enough work on the house. Conveniently this came after $2.50 pint night at Duckworth.....mmmmm


I then decided that it would be a good time to measure out the holes in the ceiling and cut them.  I did a great job measuring and taping off the ceiling myself. I was quite proud of myself and figured that would show Cacky that I was still getting things done. 
That theory went right out the window in the morning when she looked at the holes and said that they were in the wrong places!  AAAHHH, the only thing better then doing work that you were yelled at for not doing is to do it again!
Zander and Melissa were down visiting, Zander and I finally convinced Cacky to leave the lights where they were.... look below and see who had the last vote on that one...

Oh well, cutting a few holes and patching the old ones is nothing compared to the lifetime of crap I would have had to endure every time that light switch was turned on.

We ended up with at total of 6  6in lights in the kitchen, one over the sink, one in the old nook and 4 in the main part of the kitchen.


I would also like to point out just how much sanding above your head sucks on the other hand finally the kitchen is starting to look like a real room!

Archway Removal

Eamonn here,
This is a short entry about removing the archway in the kitchen. The Kitchen originally had a breakfast nook, we decided that we needed this space to put the fridge in. The fridge was just too big to keep in the main part of the kitchen.  After doing some measuring we figured out the the fridge was going to take up most of the breakfast nook anyway, so to make it feel more like one room we decided to remove the archway to open up the kitchen a bit.

 Starting to rebuild, I am not sure if I posted in another blog entry or not, but you can see the doorway that was closed up going from the old nook to the bedroom here as well.

Kitchen Wall and Cabinet Tare Down

Eamonn again here...
Now that we had finished painting the dining room it seemed like a perfect idea to take down the wall that we just painted! Well Cacky thought so anyway.  Actually I am glad we tore it down I just wish this idea came before we painted it.
Taking down the wall has opened up the the kitchen and the dining room immensely.
 I have learned from the best, when you are going to tare something down, just start swinging, figure out the details later.


Who is this guy?


After we started taking down the wall we realized it would be in our best interest to put up a header, just in case.


We then had to rerun some of electrical that was in that wall and add some of our own for hanging lighting over what will become the breakfast bar.

At some point during this the Cabinets had to come out.


Cabinets gone! Except for the sink which we sawzalled around.

Let me tell you, not having a kitchen sucks. it's not very fun to have your fridge in the dining room. At this point it feels like the kitchen is miles away from being done..

Plumbing

You guessed it, it's Eamonn posting again, Cacky still won't post.
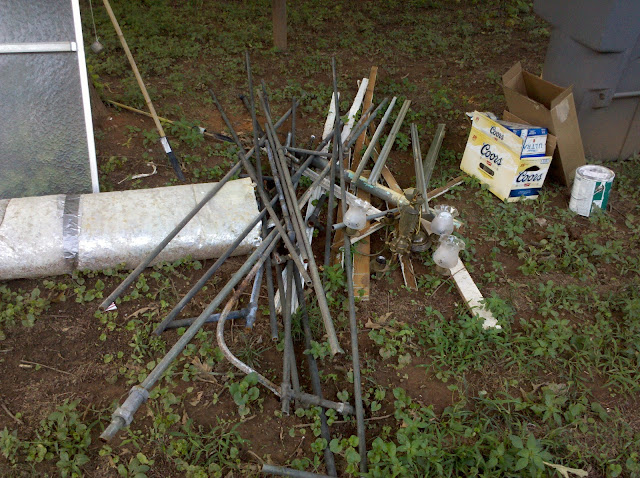
I need to catch up a bit here so I figured I would post our plumbing project. All of the pipes in the house were galvanized steel, we hardly had any water pressure.  I knew that they rusted from the inside out but I had no idea just how much the pipes would close up in the process. I couldn't fit my pinkie finger inside most of the pipes. We used my new angle grinder with cut off wheel on it to cut out all of the old pipes (thanks Garrett, it's a great tool). You can see yellow angle grinder on the washing machine.  as well as some of the connectors we used for the project.


Dan had done some plumbing in the pas and recommended that we use PEX pipes this time. Pex pips are plastic put a little bit flexible at the same time.  It is easy to work with and supposedly can't burst if water were to freeze in it.  Every time to hook up a piece of the pex to another piece you need a connector with ribs on it and a clamp. There are different size clamps for each size of pipe.  We used 3/4in pipe for the main supply around the basement and then everywhere we branched it off we used 1/2in pipe.  You can see below how this system work, slide the pex over the fitting and slide a compression ring over the pex. You then use special crimpers to crimp the compression rings so that they won't come off. You only get 1 shot, once it's crimped you have to cut it off.  The process is so easy it's amazing. 
Here is the plumbing pro at work
I have also been introduced to ball valves,  No more of those stupid screw valves that we are used to seeing on our hoses on the side of the house.  Below is a picture of the main valve in the house, so smooth, works like a champ. I will never go back to screw valves.


We also put a basin sink in the basement. I am not sure why, but Cacky wanted one and I have to say it seemed like a good idea.

There are still some things to do as we have ripped apart the kitchen (post coming soon) already and some things in the bathroom are still going to get redone.  I only managed to completely soak us once. Not to bad in my opinion. One bit of advice, when you are crawling around all day remove your keys from your pocket, If you do not you will wake up the next day with a very bruised leg!